Reference
Usage is as follows.
日本語で読む場合はこちら。
Contents
Initial Setting
User name setting
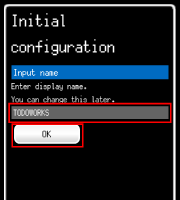
First time you launched app, initial setting screen will be shown.
Input user name which is used in this app. After input name, tap [OK] button.
If you initialized app data on Global settings screen, Initial setting screen will be shown after app restarted.
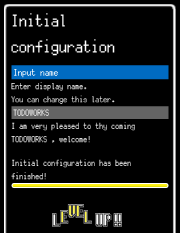
Create initial data
After you pushed button initial date are created. You can see progress—no need to operate.
After data are created, transition to Title automatically.
Title
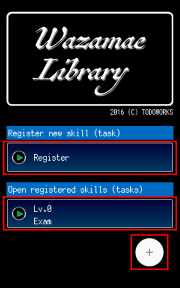
Registering new skill and open skills
This app needs to register a skill for measurement.
Tap [Register] and transition to Settings screen. After setting, skill registering has benn finished.
If you had registered skills already, they will be shown as list on “Open registered skills (tasks)” pane. When you want to open skill, tap skill name shown on list and transition to Measurement screen.
For example, tap [Exam] and you can open the skill.
Menu
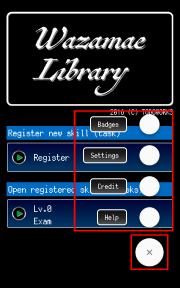
Tap [+] on bottom-right of Title screen, menu will be shown.
Tap [Badges] and transition to Badges screen.
Tap [Global settings] and transition to Global settings screen.
Tap [Credit] and transition to Credit screen.
Tap [Help] and transition to Help screen.
If you want to close menu, tap [x] button.
Settings
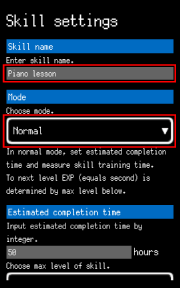
Input skill name and choose mode
Input skill name to entry field. For example, Exam, Programming, Piano, and so on.
If empty you can not register skill.
You can choose from 3 modes as below.
[Normal] mode is the mode that set maximum level and estimated completion time for measurement.
This mode is recommended when you determined a goal or period.
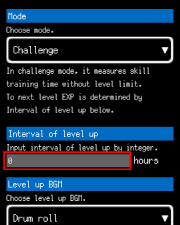
[Challenge] mode is the mode that does not set maximum level but set interval of improvement of your level. To next level EXP will be determined by “Interval of level up” value.
This mode is recommended when there is no deadline and you want to check how high your skill improvement.
Input interval time into “Interval of level up” entry field by integer which is greater than 0. If empty or the input value is less than 1, you can not register skill. For example, when you set an hour—the value is 1—, interval of Level-up is 3,600 EXP.
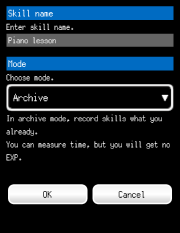
[Archive] mode is the mode that register skills what you have already.
This mode is recommended when you want to check or to take inventory your skills. (like Library)
You can measure time in achieve mode without Level-up.
You can change mode always.
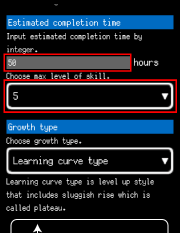
Estimated completion time and maximum level
Input estimated completion time for your skill into “Estimated completion time” entry field by integer which is greater than 0. If empty or the input value is less than 1, you can not register skill.
You can choose maximum level from 5, 10, 20, 50, 100.
You can also change maximum level always. And when it had been changed, current level and EXP will be recalculated.
Growth type
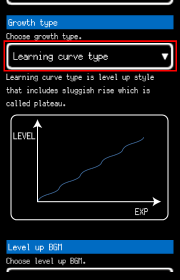
You can choose EXP increasing model for level-up at “Growth type” pane.
[Learning curve type] is a level-up style which includes plateau, so there are levels that needs less EXP for level-up, and more EXP for level-up. For example, when you move the level 4 to 5, needs 5,000 EXP. Otherwise when you move the level 5 to 6, needs 2,000 EXP. (This value is an example. )
[Game like type] is a level-up style that EXP for level-up increases according to level like a game.
Choose BGM
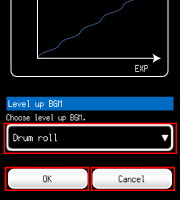
You can choose BGM which is played when you level-up. If you chose [None], no BGM will be played.
If your device is set to silent mode, this app will not play BGM. But you should confirm no BGM has been played when you use this app on silent mode, before you use this app in public place.
After finished your input, tap [OK] button and settings are saved, transition to Measurement screen.
If you tap [Cancel] button, or press back key on your device will show a confirming dialog for transition to previous screen.
Measurement
Start measurement
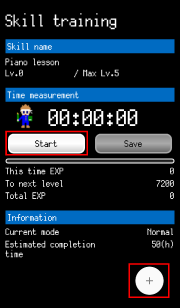
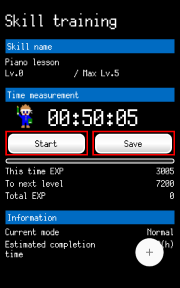
On measurement screen, you can record the time that you invested in improvement of your skills.
Tap [Start] button and measurement will be started like a stopwatch.
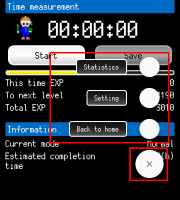
Tap [+] button at bottom-right on this screen and menu will be shown.
Stop measurement
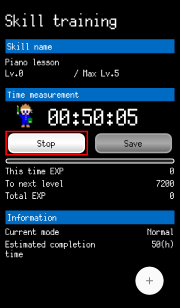
After you tapped [Start] button, this button is changed into [Stop] button. Tap [Stop] button and measurement will be stopped.
When you are measuring time, you can not tap buttons without [Stop] button.
Save your measurement
After stopped measurement, you can resume measurement by tapping [Start] button.
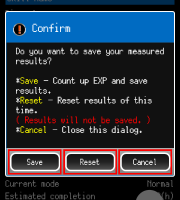
Tap [Save] button and dialog will be shown.
On this dialog, tap [Save] button and save your results.
Tap [Reset] button and your results will be discarded and reset the counter.
Tap [Cancel] button will close this dialog.
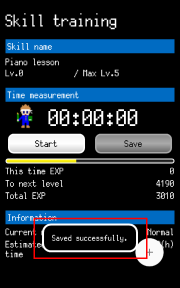
After save
When save has been finished, “Saved successfully.” will be shown.
By your device, it will take a few seconds for showing above message.
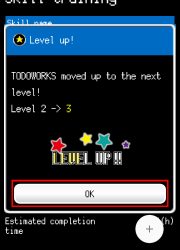
Level-up
When “To next level” EXP value equals to 0, you will move to next level and notice dialog.
Tap [OK] button closes this dialog.
Menu
Tap [Statistics] and transition to Statistics screen.
Tap [Settings] and transition to Settings screen.
Tap [Back to home] and the dialog that confirms back to Title screen will be shown.
If you pressed back key on your device, the same as above.
To close menu, tap [x] button.
Resume measurement
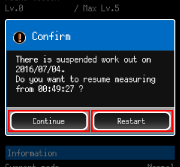
When your measurement had been interrupted for any reason, the dialog for resume the next time you open skill.
Tap [Continue] button and you can resume measurement from the time you interrupted.
Tap [Restart] button discards your interrupted measurement and start from 0.
Statistics
View charts
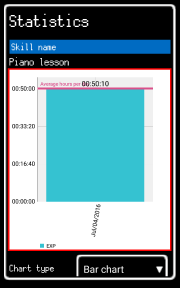
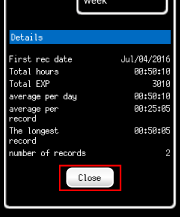
You can see skill name, recorded data and charts on Statistics screen.
Pinch-out and pinch-in can be used for zooming on chart area.
When zoomed, drag data and they will move.
Chart settings
By tapping [Close] button at bottom on this screen, back to Measurement.
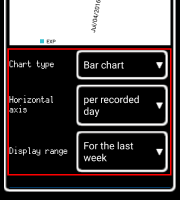
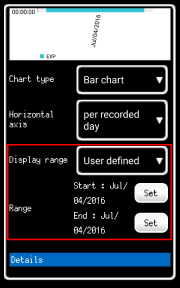
You can choose Bar chart or Line chart from [Chart type].
You can choose horizontal axis data which are records per day or record per save from [Horizontal axis].
Display range can be chose from [Display range].
If you chose “per recorded day” for horizontal axis, choose range from below.
- All
- Last 180 days
- Last 90 days
- Last 30 days
- For the last week
- User defined
If you chose “per recorded times” for horizontal axis, choose range from below.
- All
- Last 100 records
- Last 50 records
- Last 20 records
- Last 10 records
- User defined
If you chose [User defined] as range, range setting will be shown.
Tap [Set] button will show start/end point setting dialog.
On dialog, set year, month and day by tapping each [+] button or each [–] button and define date if you chose “per recorded day” for horizontal axis.
Set number by tapping [+] button or [–] button and define number if you chose “per recorded times” for horizontal axis.
In both cases, tapping [OK] button determine range, tapping [Cancel] button will close dialog with no change.
If you set start date or start number bigger than end date or end number, warning will be shown and range will be not changed.
Badges
View badges
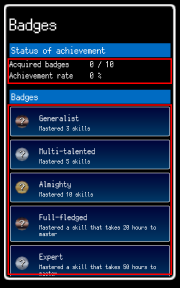
You can acquire badges when some of your skill reached to maximum level in normal mode or reached to higher level in challenge mode.
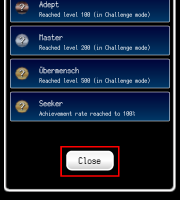
On this screen, you can check badges you had acquired and check criteria for acquiring badges.
Acquiring rate will be shown on top of screen.
There are hidden badges and they are excluded from rate.
You can back to Title screen by tapping [Close] button
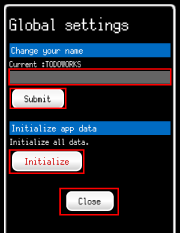
Global settings
User name setting and initialize app date
You can change user name on Global settings screen.
Input new user name and by tapping [Submit] button changes user name. If user name is empty, warning will be shown.
By tapping [Close] button, you can back to Title screen.
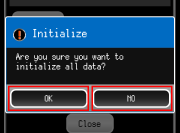
By tapping [Initialize] button, the confirm dialog for data initialization.
On initialize confirming dialog, if you tap [OK] button app data will be initialize completely. Skills, badges and other app data will be discarded. You can not be this undone.
If you tap [NO] button on dialog, dialog will be closed and data will be not initialized.
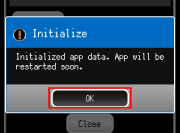
App restart
After you initialized app data, app will be restarted.
The same as first time you launched app, Initial Setting screen will be shown.
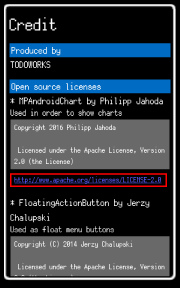
Credit
View credit
You can see information about licenses on credit screen.
This app uses libraries which is licensed under MIT License and Apache License, Version 2.0.
By tapping [Close] button bottom of this screen, you can back to Title.
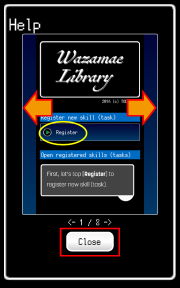
Help
Simple help
You can see simple help on help screen.
Images will be switched by flicking left and right.
By your device, [Close] button might be hidden, press back key on your device or slide pager to upper to show close button will transition to Title screen.
